Friday, 10 June 2011

Butternut squash risotto

Risotto is one of my favourite dishes. I love eating it and I love cooking it; both comforting and life-affirming experiences. Risotto used to be one of those dishes you only saw in fairly posh Italian restaurants, but it is increasingly worming its way into the general consciousness. More and more European restaurants are serving it, and more and more people are gathering the confidence to cook it at home.

Nigella Lawson once said in one of her shows that people equate the difficulty of a dish with how much time it takes to cook and she questioned that view. I am with her. Risotto may take a bit of time (all told just under 1 hour), but nothing I will describe here is complicated. Anyone with basic cooking experience (frying a sausage, boiling an egg) can manage this. I'd rather cook risotto than a souffle any day of the week!

Risotto is fantastic because it has a welcoming creamy texture which beckons you in. Before you know it, you are assailed by its warm fuzziness. It is a comfort food which crosses all boundaries of age, nation and background. It is also tremendously versatile, and can be made with meat, veg, fish, seafood etc. If you are really interested in getting to cook these amazingly rewarding dishes, I would recommend Valentina Harris' excellent book 'Risotto! Risotto! 85 Recipes and All the Know-how You Need to Make Italy's Famous Rice Dish', published by Cassell in 1998. It has many classic recipes but also includes some curveballs; strawberry risotto and a risotto made with a WHOLE bottle of Barolo wine!

My recipe below is for 2 people. If doubling, matters are fairly easy; just double. However, I have found a very useful rule of thumb is to allow 65g risotto rice per person for a good size main course and 75g for greedy people.

My risottos are a synthesis of a number of recipes, techniques and mixes of ingredients. I do what I feel is right for the occasion. Once you get started, you will too!

Please don't panic that my recipe uses alcohol. It is perfectly suitable for children and other vulnerable people. I do not use the booze for its alcohol content, rather than its ability to impart flavour to the rice and its knack of starting to get the rice to ooze out its precious starch. Once the liquid disappears, which you will find is my method in the recipe below, all the alcohol will be burnt off. No risk of inebriation.

I have but one plea: please ensure you use risotto rice and no other. You can use Arborio, Baldo, Carnarole, Padano, Roma, or Vialone Nano, depending on what you can find and your budget. For this recipe I used Arborio. When I visited Venice I bought some Vialone Nano as it is the local variety for that area. It yielded extremely delicious results. It is available at Carluccio's for £5.95 per kilo.

You cannot use any other rice and get the same results. Basmati, patna and Thai fragrant rice are long grained rices and will not absorb the liquid stock as well. They will also fail to give you the sticky, oozy texture you need for risotto. Paella rice is short grained like risotto rice, but is not as starchy, which will mean again, you will not get the right texture. If you buy high quality risotto rice it may seem expensive (I pay £3.45 for 1kg in my local Italian deli), but having said that, I get 13 portions (6-7) meals out of that box of risotto. This ends up being pretty good value, given you can pay £12 for risotto in a restaurant!

(serves 2)

Ingredients:
Half a roasted butternut squash
1½ French/ordinary shallots, finely diced (5-7mm) (if you can't find shallots, use a small, mild white onion)
1½ sticks celery, fibres removed if tough, finely diced (5-7mm)
2-3 cloves garlic (depending on your taste) very finely diced (1-2mm) or crushed
1 wine glass vermouth (125ml) (Dry Martini/Noilly Prat) – very preferable as it gives better results for this dish, but if you don't have any then use dry white wine
150g Arborio risotto rice
750ml vegetable or chicken stock (roughly – don't worry if you don't use it all)
2tbsp extra virgin olive oil
1tbsp + 1tbsp unsalted butter
2 bay leaves
4-5tbsp finely grated parmesan cheese
Sea salt – if you are using homemade stock. Leave out if using stock cubes.
Freshly ground black pepper

Toppings:
Veggy topping: 14 sage leaves
Meat-eaters topping 100g (or thereabouts) finely sliced Italian Pancetta (NOT cubetti)

Method:
  1. Start by making the topping. If you are making the Veggy topping, use all the olive oil to fry the sage leaves until they change colour to a deep oily green and start to go crispy.
  2. If a meat-eater then dry fry the pancetta in a non-stick pan. 
  3. You will know it is done when it goes brown and crispy but is not burnt. 
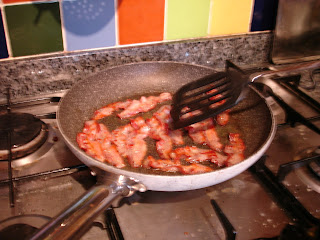
     
  4. When the toppings are done remove them and place on a plate covered in kitchen roll to absorb the excess fat/oil. 
     
  5. If you are making the Veggy topping, save the oil for making the dish with the sage-y flavoured olive oil.
  6. Heat the oil and 1tbsp butter in a pan (large enough to make the finished dish). 
     
  7. Add the shallots and celery. Fry gently for 5 mins. Add the garlic. Fry for another 5 mins – do not allow to brown.

  8. Whilst the shallots are frying, put the stock and bay leaves in a pan on the heat and cover. This should be lightly steaming before it is ready to add to the risotto. 
     
  9. Add in the rice. Keep stirring and cook for about 1 min to coat the rice in the fat and toast it through.

  10. Now add the Vermouth. 

    Increase the heat. Stir frequently until all the alcohol has disappeared. I would say this takes 2-3 mins.

  11. You are now ready to start adding the stock. You should lower the heat to a medium heat at this point. This is the main process of making a risotto. Take the lid off the stock pan. Add the first ladle of stock. You will now be 25 mins (or thereabouts) from the rice being cooked and 30 mins from serving up. Set a kitchen timer to 25 mins from this point).
  12. Stir the risotto several times until the stock is completely absorbed. Be careful, once the liquid is gone, the rice will be liable to catch and burn on the bottom.

  13. Reduce to a low heat. Add stock, ladle by ladle, stirring as constantly as possible (to release the starch from the rice) as you go.
  14. Once you have 10 mins to go on your timer, add the butternut squash (unless you have taken it straight out of the fridge in which case use 12 mins as the time indicator on your timer).

  15. You may still need to add in stock, depending on the absorbtion power of your rice or the power of your hob. Try the rice from time to time to see how soft it has got. It should not taste grainy.
  16. As it gets to a soft cookedness, stop adding stock. Allow all the remaining liquid to cook off. You do not want any soupy stock at the bottom. You want an oozy, semi liquidy almost sludgy texture (sounds unappetizing, but believe me, this is right).

  17. Now turn the heat off. Take pan onto another surface. Add 2nd tbsp of butter and 3tbsp of the parmesan. Stir thoroughly into the risotto until mixed. Put lid on pan and allow to rest for 4 mins. 
  18. Stir. 

    Now dish up into bowls. Top with the rest of the parmesan and then the topping of your choice.

  19. Serve and enjoy!

    PS: A word about the need for stirring of a risotto. Some people will have you believe that you don't have to keep stirring and that you can leave the risotto cooking and it will come out fine as long as the bottom doesn't catch. NOT TRUE! The stirring is what helps the rice release some of its starches into the pan to give you the gloopy, soupy texture that risotto is all about. Not stirring frequently will simply mean a less tasty and satisfying result. So, it will take time and effort. But as I said in my very first post; put some music on and you'll find the time passes in a most enjoyable way. I find the stirring like a form of meditation, I feel very rested and even 'Zen'. The investment of your time will never pay off so well, I promise!

Thursday, 9 June 2011

How to roast butternut squash

Butternut squash is a truly wonderful vegetable. The flesh is a luscious orange colour and when cooked is sweet and tender. It is also very healthy, being an obvious source of dietary fibre. However, it also contains vitamins C, A and E. Healthy and tasty? What are we waiting for – let's start cooking! Butternut squash can be used pretty much interchangeably with most forms of pumpkin in recipes, which means it is pretty versatile. I use it in risottos, salads, as a vegetable accompaniment to dishes and in soups. It can be used in many other dishes, such as curries, tagines and pastas.

What I intend to do in this post is show you how to roast a whole butternut squash to prepare it for a couple of dishes that I like to make using this most useful of vegetables. (Recipes to follow in the next few days).  I really think that its sweetness and smoothness when cooked makes it perfect for children who are suspicious of vegetables. The orange colour is also a world away from the green that children seem to instinctively dislike.

When buying a butternut, look for one with a good even colour. Ensure that the skin is intact. It should be like a tough, hard shell when raw. When you pick it up it should feel solid and heavy. They keep for quite a while if kept in a cool dry place, up to a couple of weeks. Don't wrap in plastic or it will get moist and start rotting. When raw it doesn't need refridgeration, but when cooked, keep the cooked stuff wrapped up and in the fridge. Perhaps if you only cook part at a time, you may want to wrap the uncooked squash up and keep it in the fridge. However, I would say that it will probably save time and a lot of energy to cook the whole squash (only one preheating and cooking time of power will be incurred) and keep the rest, planning another squashy meal later in the week. 

If you are cooking for a family, you may want to cook 2 squash in this way, and use one whole squash for one recipe and the second for another. These days with gas/electric bills being what they are (not to mention the cost to the environment) we should try to get our ovens to 'multi-task' wherever possible to save energy - getting the cooked ingredients for more than one meal is just one way of doing this!

So, you will need:
1 butternut squash
2 large sprigs fresh rosemary
4 small sprigs fresh thyme
1-2 tbsp extra virgin olive oil

  1. Preheat the oven to 180°C.
  2. Cut the butternut squash in half vertically.
  3. Do not attempt to peel the squash. When cooked the skin will come off easily.
  4. Scoop out the seeds with a spoon. You can wash the orange stringy flesh off them and roast them for a healthy snack – they need about 10-15 mins in an oven at 130-140°C. 
     
  5. Once the seeds are gone, scrape out any of the last bits of soft stringy flesh. The flesh you want should be solidly dense and quite hard to scoop. As soon as you start feeling resistance on the spoon, you are done.
  6. Place on a baking sheet/tray, cut side up.
  7. Pour olive oil onto cut surfaces. Rub in thoroughly. If keeping your oil/fat intake down, hold over baking tray to allow excess to drip off.
  8. Place herbs over cut surfaces.

  9. Cook in oven.
  10. The time this will take will depend on your oven. Fan assisted will be about 30mins. Non fan assisted could be up to 45mins.
  11. You will know it is done when you try to insert a sharp knife into the flesh. If the knife goes in easily and softly, the squash is done.

  12. Take out of the oven, throw away the herbs, put on a plate to cool.
  13. When you are able to handle the squash halves, peel off the skin.
    Variation:
    If you are thinking of having roast butternut squash as an accompaniment to a roast or other dish, you could leave out the herbs and instead sprinkle ¼ teaspoon paprika and a ½ teaspoon whole cumin on the cut surfaces of the squash before cooking. It will give a fragrant spicy smell reminiscent of Middle-Eastern and Indian food.


Tuesday, 7 June 2011

2 Ways with Char Siu Pork: #2 - Char Siu pork salad with Thai dressing

Yesterday, I posted my take on lunchtime wraps, using some of the large piece of Char siu pork I bought from the Chinese supermarket. Here is the supper dish I made with the rest. It is a salad in the Thai style.

Thai salads are not usually eaten as a starter or a main course. They are put in the middle of the table and eaten with the rest of the meal, which will include rice, a soup and either a stir-fry or curry dish. All the dishes are shared by those seated around the table. Eating is intended to be a social experience. Some Thai restaurants still serve food in this way, arriving at the table when ready. If so, the restaurant will describe their service as 'family style'.

I have found that Thai salads make great dinners. They are low in fat, high in flavour and with careful ingredient planning can give you 1-2 of your 5 a day fruit and vegetables. They can make a small amount of meat go a very long way. Another advantage is apart from some chopping and preparation, they are ready quickly, making them a lifesaver midweek dinner when you don't have much time to devote to cooking. If you are avoiding carbs, then some of these salads will be of great help.

Thai salad dressings are supposed to balance out all the main flavour groups; sweet, sour, bitter and spicy. Please feel free to adjust the taste of the dressing if my formulation doesn't appeal. Thai chilis are very hot indeed, so reduce the number if you don't like it hot. Similarly, if you like it hot but can't get Thai red chilis, then use 3-4 mild red chilis.

(Serves 2)

For the salad:
250g Char siu pork, sliced finely
1 handful lamb's lettuce / similar salad leaf
1 handful coriander leaf, chopped
1 handful mint leaf, chopped
1 stalk lemongrass, outer leaves removed, and sliced very finely
3-4 spring onions, sliced diagonally
3-4 Thai shallots, halved and then sliced finely

For the dressing:
2 tbsp lime juice (1 big lime should be enough)
2 red chilis (Thai preferably), deseeded and chopped into extremely fine dice
3 cloves of garlic, crushed/grated
3 tsp fish sauce
3 tsp palm sugar (or brown sugar)
½ tsp salt

Topping:
Chopped fried garlic
Chopped fried onion
(available pre-prepared and in jars in Chinese grocers)

Method:
1. Mix up the dressing in a non-metallic bowl and leave for 5-10 mins for the flavours to blend.

2. Mix up all the salad ingredients except for the pork in another bowl. Or go straight to the next instruction.

3. Take the salad mixture and put in two serving bowls/dishes.

4. Pour the salad dressing over all of the salad.

5. Place the pork slices on top.

6. Sprinkle with the topping and serve immediately.


Monday, 6 June 2011

2 ways with Char Siu Pork: #1 - Char Siu Pork Wraps

I'm not that into sandwiches. So lunchtimes can be a time where I can struggle to find something good to eat. I gave up on the sandwich shops near my work a long time ago. The good ones cost a small fortune and the bad ones..... Well, I am sure we have all encountered those sandwiches which sit in nasty plastic boxes on a refridgerated lorry for hours before sitting in a chiller cabinet for a few more hours, waiting to be bought. By the time you do, they are soggy and cardboardy. Not much of a treat after a morning's worth of hard work!

Some shops do wraps, but again, if they have been knocking around too long, they too taste past their best. The only way, therefore, is DIY; make your wrap of choice by yourself. You get something as fresh as you like, for a fraction of the price of a sandwich shop and because you have to buy a pack of 6-8 wraps, you have plenty left for the rest of the week! Even Charlie Sheen would agree that you're winning!

This idea for a tasty lunch came from my trip to See Woos in Greenwich. See Woo is a Chinese supermarket which sells everything you need to make your own Chinese, Thai and Japanese food. They keep fresh fruit, vegetables, and herbs for any kind of Pan-Asian cooking. Their freezer section has all those wonderful things you get from the take-away; spring rolls, edemame beans, sesame toasts. If you are more adventurous: sliced hot pot meats, mussels, prawns and whole fish. They also sell a full range of rice, noodles, sauces and tea. Some of my favourite things there are the cooked meats (crispy belly of pork and char siu pork) and their baked goods (particularly the buns).


On my last visit I bought a large piece of Char siu pork. If you have never tried this before, it is wonderfully tasty, glossy, barbequed pork. Usually made of shoulder, it has been marinated and glazed with honey, red tofu, soy sauce, hoisin sauce, rice wine (shaosing) and five spice before being cooked. Sound delicious? Because it is!

So I am going to post my Char siu wrap recipe and a Thai style salad for you (to follow), since these were the dishes I made with my bumper size piece of pork. You can make your own roasted pork for these recipes, but I wanted to make my life a little easier for myself.

Here is Nigel Slater's recipe for making the pork from scratch:
This recipe comes from Chinese food author Deh-Ta Hsiung:

Ingredients:
100g char siu pork
1 wheat flour tortilla
2 spring onions, cut in half vertically
1 handful rocket leaves
1 large / 2 small ripe tomatoes, sliced
good dollop hoi sin sauce

Method:
Slice up the pork finely.
 
Put the tortilla on a plate and spread hoi sin sauce in a strip across the middle.
Lay the pork on the sauce.
Add the tomatoes and spring onions.
Add the rocket.
Roll up and cut in half. If your wrap threatens to unravel, use cocktail sticks to pin it together.


Friday, 3 June 2011

Recipe Road Test: Lamb Chops with Pickled Cauliflower

My challenge for this blog entry was to take a recipe by a renowned chef for an 'achievable' or 'easy' supper dish and test it out.

My choice of recipe came from the Guardian website, having been devised by Angela Hartnett. Angela will be known to many people in the UK as a former contestant and current judge on 'The Great British Menu'. Her 'day job' is as chef patron and owner of Murano restaurant (which she recently purchased from her mentor's company, Gordon Ramsay Holdings) and as the consultant chef at the Whitechapel Gallery Dining Rooms (which I can vouch for as being a delightful place for Sunday lunch). She is one of the nation's top chefs, and a real inspiration: a female chef who has made a name and amazing reputation in a male dominated trade. I was hoping for a dish which would be wonderfully tasty, but also simple enough that the likes of me wouldn't mess it up!

I do not believe in plagiarism of any kind, so if you want to see Angela's recipe, you will find it here:

Firstly, I prepared everything I needed for the pickled cauliflower salad. I started by dry roasted some pine nuts in the smallest pan in the house (a milk pan) until they just changed colour. Then I used the same pan to dry roast the cumin seeds (how much washing up do you expect me to do in the name of gastronomical experiment?). After allowing them to become fragrant and darken a little (about 3 mins in a hot pan), I ground the cumin seeds. 


Then I mixed together the vinaigrette for the cauliflower. This was made of olive oil, red wine vinegar and the cumin.


Next I had to cook the cauliflower.  The only description for the size of the florets was 'large' and that they would need about 5 minutes cooking, so I had to do my best to guess what the correct size was and hope they would not overcook. This is the rough size I came up with:

With a 5 min cooking time (cauliflower floret usually take 7-8 mins to cook), I suspected it was an 'al dente' effect she was guiding me towards, with the vinaigrette doing the rest of the work. Whilst boiling, I prepared the chopped parsley.

After cooking and draining the florets, it was time to assemble the cauliflower salad. The picture above shows all the ingredients prior to mixing (including the raisins added at the last minute). The heat from the florets is supposed to help marinate the salad, so I mixed it up and allowed it to cool before moving to cooking the lamb.

I used my griddle pan to cook the lamb chops. My grill isn't very controllable and takes so long to get to a high temperature, I thought there would be less fuss and time wasted by using the griddle. I heated up the griddle on the hob before adding the lamb. The recipe called for 3 mins each side.


Of course, the other advantage of a griddle pan is the nice dark stripes it puts on the meat which always looks really appetising!

Then of course, it was time to 'plate up'. I served two chops each with the cauliflower salad and a little rocket.
So, the verdict...
I'm not so sure this recipe is a complete success for us, but may well be for others. It will depend on your taste (see below). I was able to follow it and not too much went wrong. 

You will notice that the 4 chops are not of equal size, so the cooking time ended up being a bit of a problem. I intended to have the 2 small ones and give the larger ones to Him Indoors (men and their red meat should not be parted!). Sadly, his ended up being a little rarer than they ought to have been. They could have done with about an extra minute overall. Mine were perfectly done, and I'm glad to have learnt a method and timing for cooking lamb chops, something I've avoided. I've always worried about either under or over cooking meat, so I think I now have it licked.

I enjoyed the cauliflower salad, but wasn't so sure how well the 2 components (the lamb and the salad) went together. The cumin, raisins and pine nuts from the salad suggested Turkish/Middle Eastern influences, yet the lamb is cooked very plainly. Him Indoors, on the other hand, really did not like the salad, saying he found it too sour and vinagry. In my experience, women tend to prefer tangier sour flavours and men less so, therefore I guess that is just a male-female thing.

Sadly, therefore we will not be having this again. I will return to Angela's weekly recipes for the Guardian as I'm sure subsequent recipes will meet with more success in Snig's Kitchen! 


Monday, 23 May 2011

How to make Thai inspired steamed fish

I originally posted this recipe on facebook, long before I ever thought of doing a blog. At that time, I'd just come back from my Summer holidays to Italy and France and was looking for ways of making low fat delicious food since I had to lose the points I'd piled on whilst on holiday.
Since I am now recently returned from the land whose cuisine inspired this dish, Thailand, land of smiles, I thought it might be a good time to post this to my blog. I had steamed fish whilst on my travels in Thailand; they steam the fish whole with lots of chili and lime. The results are incendiary but immensely satisfying!

Picture: Steamed whole fish at Phu Lae Restaurant, Chiang Rai, Thailand


I'll confess that I've always been a little scared of cooking fish. That's because, much like the rhyme about the 'little girl with a little curl right in the middle of her forehead' when the dishes come out good, they are very, very good and when they are bad, they are horrid. Overcooking is, to my mind, the biggest disaster in fish cookery. It is also the sin I commit the most often. So I invented this dish to avoid that problem. Steaming does not involve the direct application of heat to the fish, which is why it gives you the most leeway with cooking time. Pan-frying gives none; it is either cooked perfectly or overdone. I am not alone in the use of steaming as a method of cooking for fish. Although out of favour in the UK, it is common in China and across the south east of Asia. The benefits are, as I say, it avoids overcooking, but it also maintains the integrity of the fish, and does not involve copious amounts of fat.

Here are the ingredients:
2 fillets of haddock (around 350g total) - You could use any fish you like, though
1 2cm piece of ginger, peeled and sliced into rounds
2 chillies sliced in half
1tbsp chopped coriander
1 lime - juiced
1 tsp sesame oil
1 tsp soy sauce
half a clove of garlic chopped into tiny pieces

Mix up all the ingredients except for the haddock into a large bowl. Once mixed, put the haddock on top, skin side up. Move around so that the filletted side comes into contact with the other ingredients. Marinade at room temp for 5-10 mins (the time it takes for the water in your steamer to come to the boil).

I have both a metal steamer pot and a bamboo steamer, but only the metal pot was big enough to fit the fish into. If you have a bamboo steamer with a bottom big enough to fit a china plate on, that would be the perfect utensil for the job. I had to improvise - so I used a piece of doubled up foil bigger than the bottom of the steamer with the edges rolled up to hold in all the juices.

Once the water in the pan is boiling, empty all the marinade ingredients onto the foil or plate. Place the fish skin side up on the plate or foil. Put the lid on. 

Steam for 8-10 mins. Scrape off marinade ingredients before serving. 

Serve with rice or salad, although I served it with a rice salad!

First posted by Snigdha Nag on facebook on Tuesday, 17 August 2010 at 10:57

Saturday, 21 May 2011

TV review: Two Greedy Italians – Episode 3 – Piedmont (BBC)

The premise behind this programme is that two key figures in Italian gastronomy who have lived away from their homeland for many years return to rediscover their homeland, its cuisine and comment on how much or how little things have changed since their departure. It's a wonderful concept combining two real passions of mine; food and travel.

Our guides are Antonio Carluccio, one of the founding fathers of real Italian food in the UK and Gennaro Contaldo, one time mentor to a certain Jamie Oliver. These two were one-time colleagues and friends but have only recently made up after a major falling out which happened some time ago, a fact alluded to on the show.

The concept of the show is that our two heroes travel around both north and south Italy, usually in vintage automobiles, meeting foodies, shopping in markets, cooking and eating along the way. They bicker and tease each other and show a north v south rivalry which will strike a chord among many English who feel the north/south divide is alive and well. Carluccio is northern Italian whilst Contaldo hails from the south.

Episode 3 which aired the past Wednesday, dealt with the Piedmont district, the area where Carluccio grew up in. He was a an effusive and enthusiastic guide to the area, showing the market, the house he grew up in and spoke with great sincerity about his memories of growing up in the region, including the tragic death of his younger brother who drowned in a pond aged only 13.

The food they explored was of the northerly region they traversed. Influenced by Germany and France, it is a cuisine apart from the rest of Italy. Apple Strudel, that classic German dish was demonstrated by Carluccio as an example of the neighbourly influence of nearby Germany and in a cafe the patisseries of France and Franco-influenced dialect of Piedmont demonstrated the cultural impact of France.

Some of the banter between the two cooks was sometimes childish and felt put on for the cameras. Particularly when the two bait each other for being unable to cook, these scenes appear to be part of an act Carluccio and Contaldo feel obliged to present for the cameras. One wonders whether their reconciliation is a real and permanent one given the constancy they revert to the childish baiting of each other.

However, it is the food which takes centre stage. The truffles literally dealt for cash out of the back of cars as if they were drugs or other dodgy contraband, the risotto rice grown in the region (Carnaroli rice from the area has D.O.P. Protection under EU law), the home cooked dishes loved by the locals. The truffle dish demonstrated by Antonio Carluccio using fresh pasta with chicken livers and truffles was a lesson in how simple but good ingredients can make a stunning dish. By contrast, Gennaro Contaldo's eastern influenced slow cooked pork dish with ginger showed how cooking techniques can be used to make a simple ingredient amazing.

What made real impact on me was the examination of the situation that recent migrants to the north of Italy have found themselves in. Contaldo and Carluccio both made their names and gastronomic reputations in the UK. The UK has a global food scene which includes the foods of most of the nations on this planet. However, despite this, some Italian towns do not allow foreign restaurants to open within the city walls/city limits. Tuscany has banned foreigners from growing any fruit or vegetables which are not Italian in nature. Despite being successful and working within Italian legal requirements, Chinese farms in the Turin area growing Chinese produce are threatened with closure.

Apparently this is all being done to protect Italian culture and the Italian culinary heritage. It smacks to this viewer of out-and-out racism. This saddens me greatly. Multiculturalism has brought strength through diversity to the UK. As a result, London now has a restaurant scene that gives Paris, Tokyo and New York a run for their money. And I reckon we are winning. This Italian 'protectionist' attitude is retrograde and backward. If they are confident in their cuisine, allow it to be open to competition! I don't have any doubt that the strength of Italian cuisine and the depth of love shown to it by its own people means it does not have to feel in any way threatened by the food of its recent migrants. However, banning foreign food and foreign produce being grown shows a lack of tolerance no civilised nation should display.

Our hosts were quick to make the very sensible point that Italian food has successfully incorporated a number of ingredients which were not native to Italy to great effect. What would Italian food be like today without tomatoes, basil, potatoes and maize (for polenta)? The forefathers of the Italian cultural heritage welcomed those ingredients and made them their own without fear or reservations.

Contaldo himself described the protectionist policy as 'silly'. He was then admonished by Carluccio for saying so, but he then added the withering words 'no one said it was sensible.' Amen that these two champions of Italian food, ingredients and culture are with me that the Italian government's current policy is both distasteful and absurd.